
Zoom has two ways to record: Local and to the Cloud. Local recording allows users to record a meeting video and audio to a local computer. Cloud recording allows users to record to Zoom cloud or online storage, and includes options such as audio transcription. Recorded files can be uploaded to other cloud storage or services for sharing, such as Box, Google Drive, YouTube, or Sakai. Zoom cloud recordings can be shared directly via a web link. Please note:
- Participants must be allowed to record by the Host.
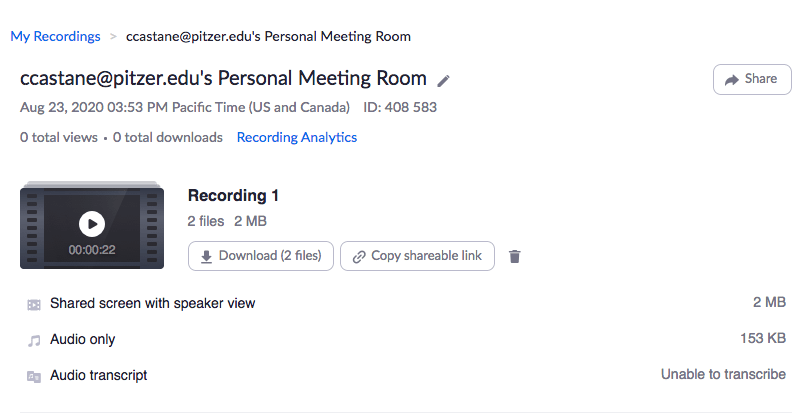
- Audio Transcription is only available on cloud recording.
- Box is recommended for long term and archive storage for all local and cloud recorded video content.
Zoom can also be a simple lecture capture system by running a meeting with only oneself, while sharing the screen as a typical meeting or class. All meeting activity including host voice narration (your voice), and screen sharing will be captured and saved.
Quick Guides:
Local and Cloud Recording Settings
- Enable local and/or cloud recording in Settings under your Zoom profile. Only cloud recording has additional features and options.
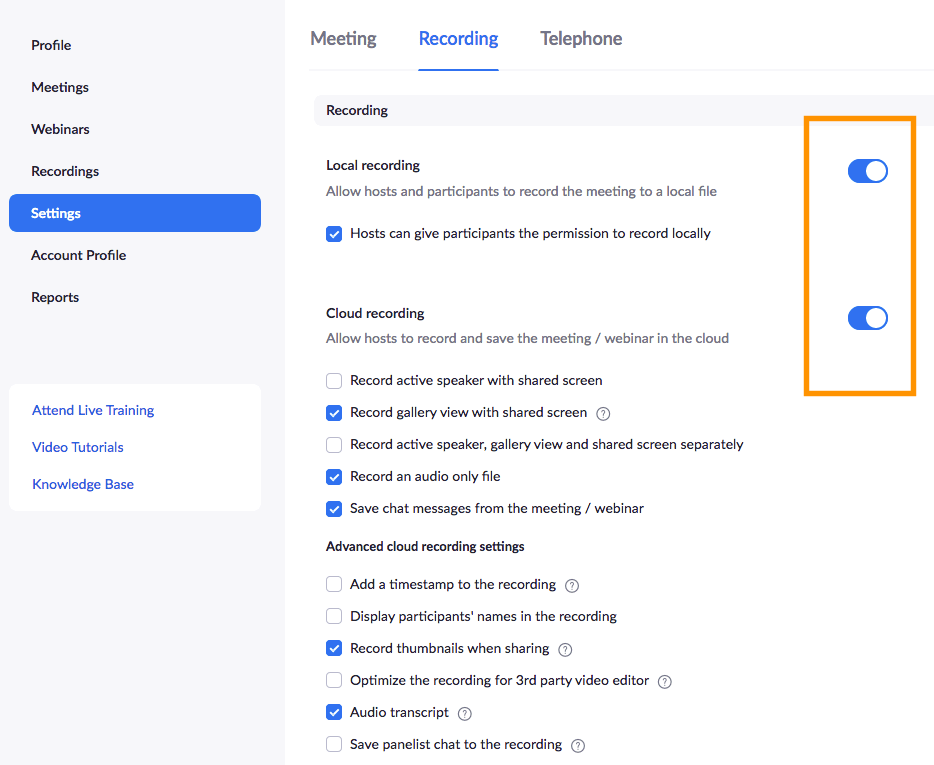
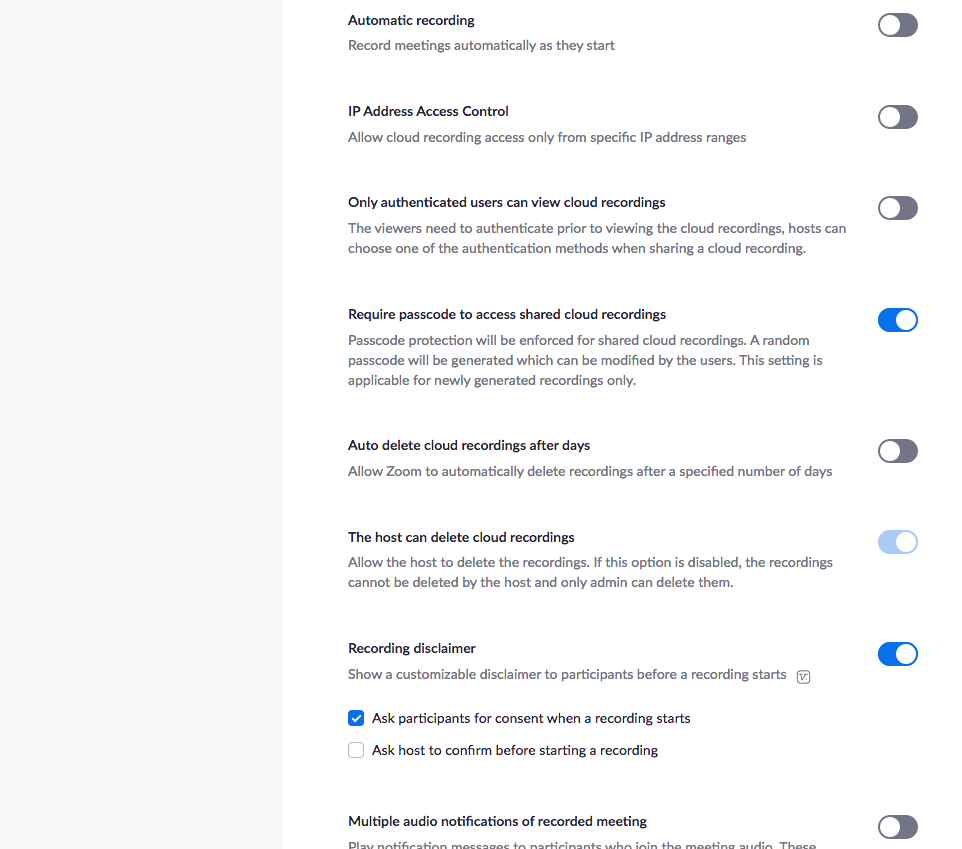
- Enable additional optional cloud recording settings
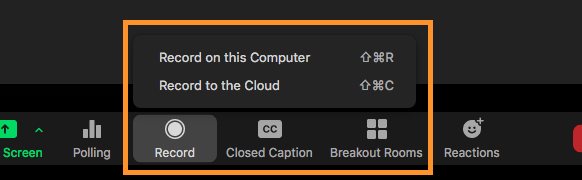
Start Recording
- To begin recording, click record button on toolbar If both local and cloud recording are enabled, both options will appear. If only one method is enabled, selecting record will be start recording immediately.
- While recording, a notice is displayed to all meeting members (and audio notification if enabled)

- Pause/Stop the recording with toolbar controls or mouse over to recording indicator

- When stopped, a message will appear

or
Local Recording
When the meeting ends, a Converting meeting recording window indicates processing on the local computer appears. When completed, you can save the files in the default folder or change their location. The files include: the video(s), an audio only version(s) of the meeting and the text of the chat if available.
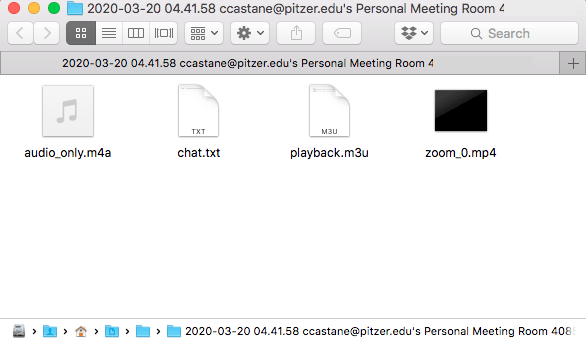
- By default, all recordings will be placed in a Zoom folder beginning in the following file path:
- PC: C:\Users\User Name\Documents\Zoom
- Mac: /Users/User Name/Documents/Zoom
Cloud recording
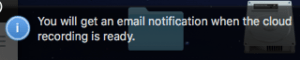
- After stopping recording, a message will appear

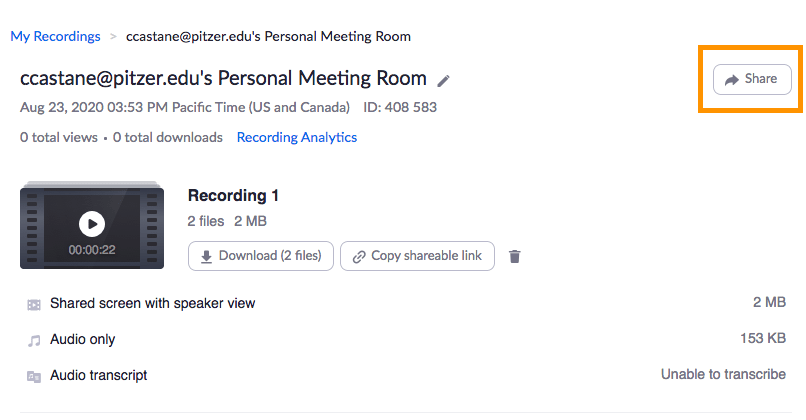
- Find your cloud recordings in Recordings under your Zoom profile
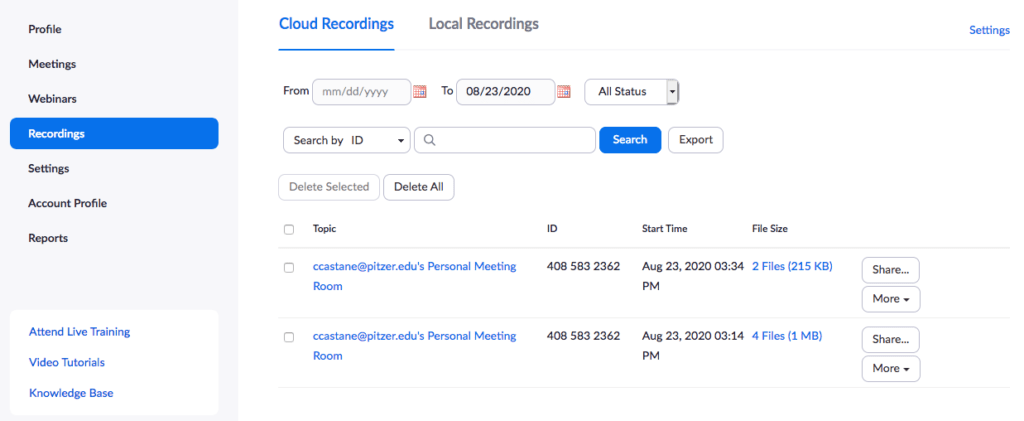
- Select a recording for details and options
Recording options
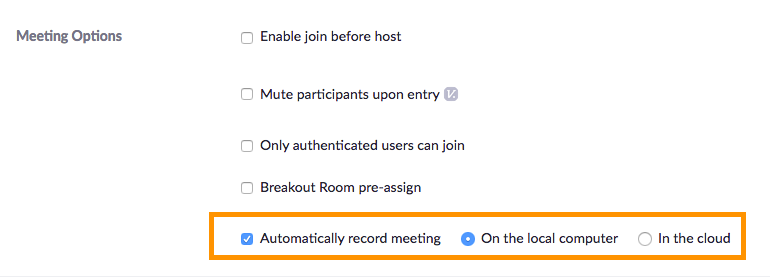
- Automatic Recording: enable in Meeting options or set as default in Settings
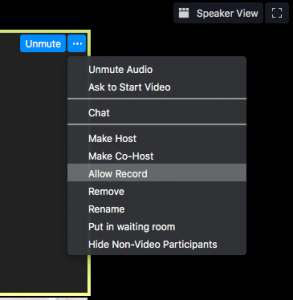
- Participants Recording: Hosts must allow participants to record meetings, participants cannot automatically record a meeting.
- In the Manage Participants panel > More > Allow Record to allow a participant to Record.
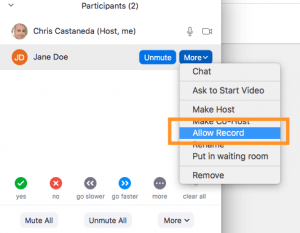
- OR from the Gallery view, from the Participant option menu
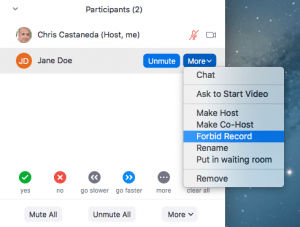
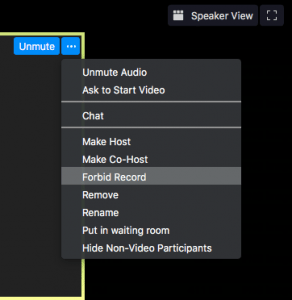
- Hosts can also withdraw the permission, in the Manage Participants panel > More > Forbid Record to prevent a participant from recording
- OR from the Gallery view, from the participant option menu
- Recording Consent: A Recording consent acknowledgement prompt is available for participants, and can be enabled in Host’s Settings

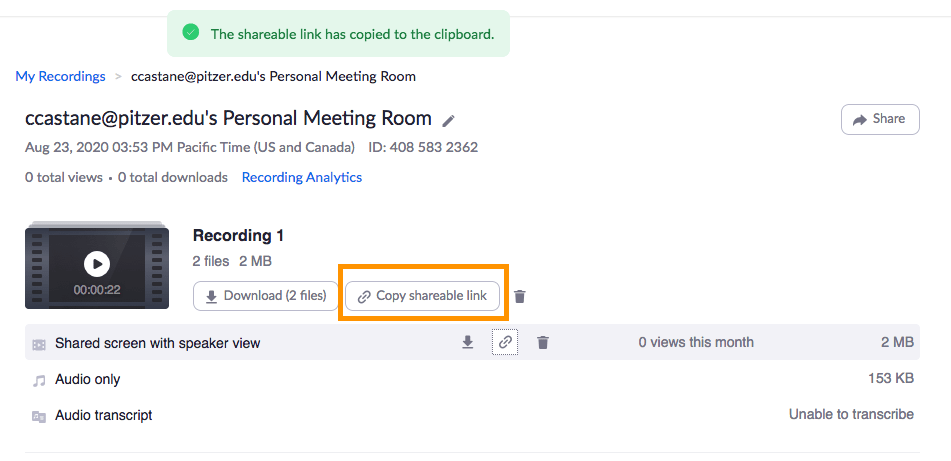
Share from Zoom
- In meeting details, select Share for options
- Set sharing and download options

- Select Copy shareable link to add into Sakai, email or other
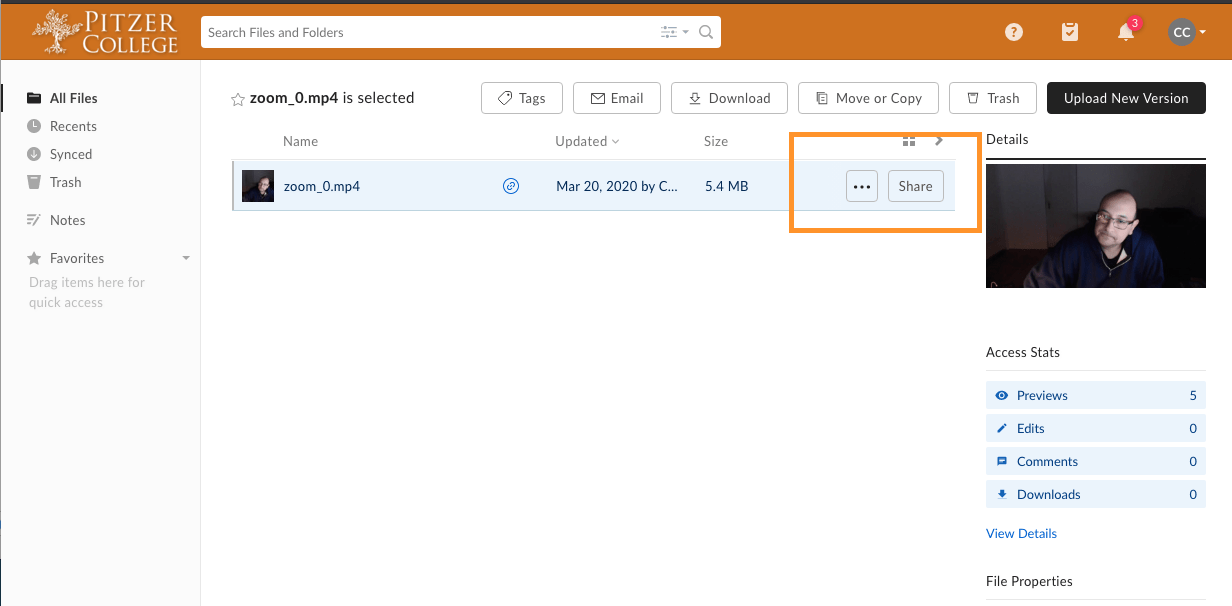
Upload to and Share from Box
It is recommended to use Pitzer based Box in order to share your Zoom recordings. Upload your videos into Box and add shared links into Sakai or email.
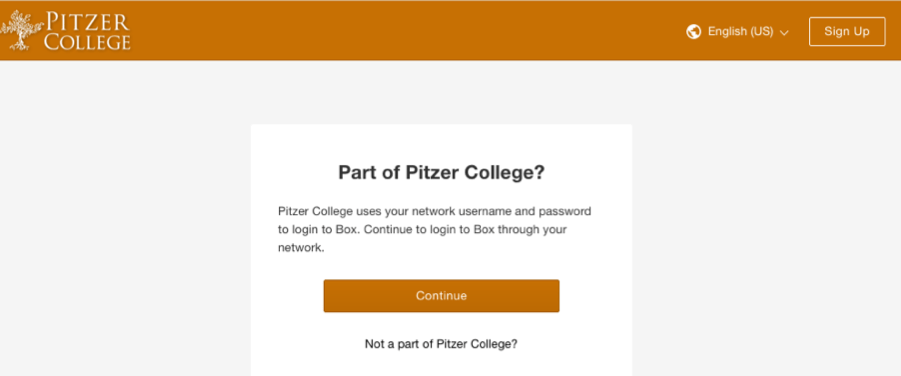
- Login into Box directly of via www.pitzer.edu > Resources > Box Cloud Storage.
NOTE: First time users only need to log into Pitzer based Box to setup your account, no other changes needed.
- Upload the video into Box with the Upload option or by dragging your file into the folder in Box
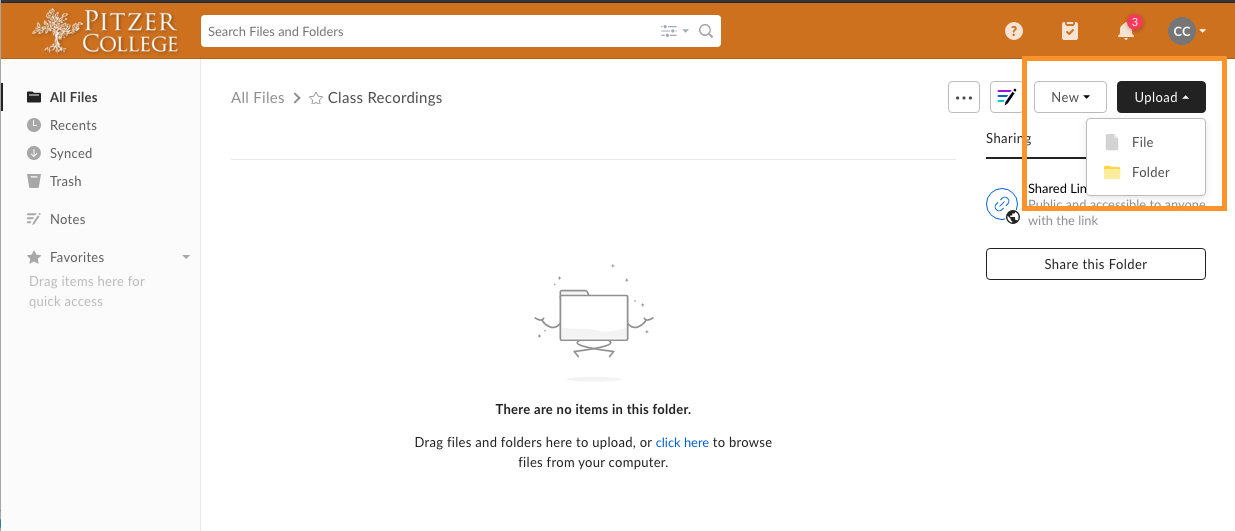
- Click Share on the video file or folder to set your share options
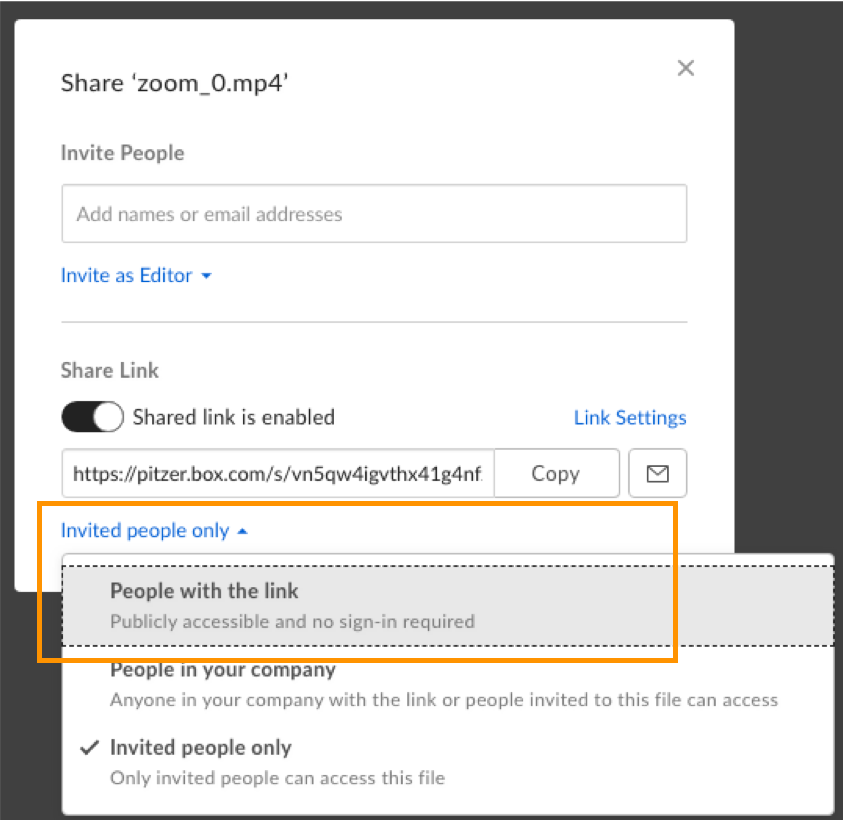
- Change to “People with the link” in order to share with students (including non-Pitzer)
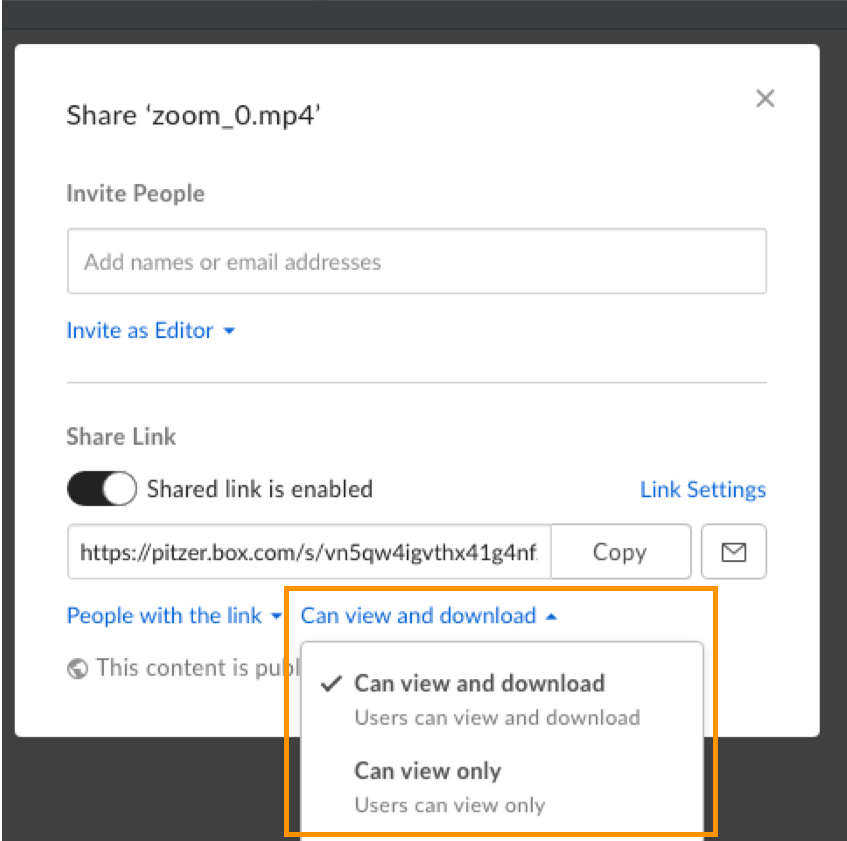
- You set the video either as view only or allow view and download the video.
NOTE: View only option does not prevent viewers from capturing video from a different device or other means.
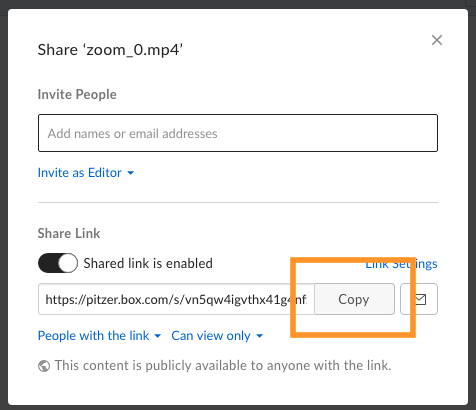
- Select Copy in order to paste link in Sakai (or email)
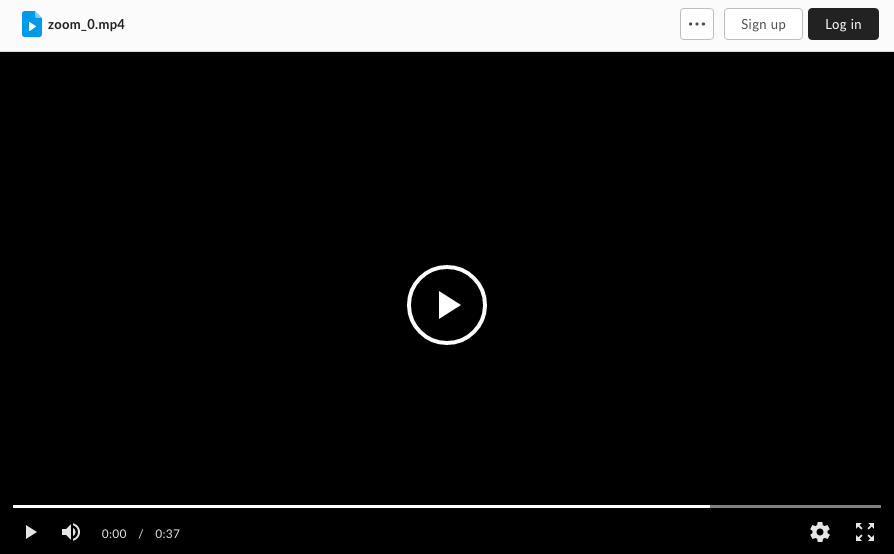
- If “Can view only,” video will only be streamed such as the following
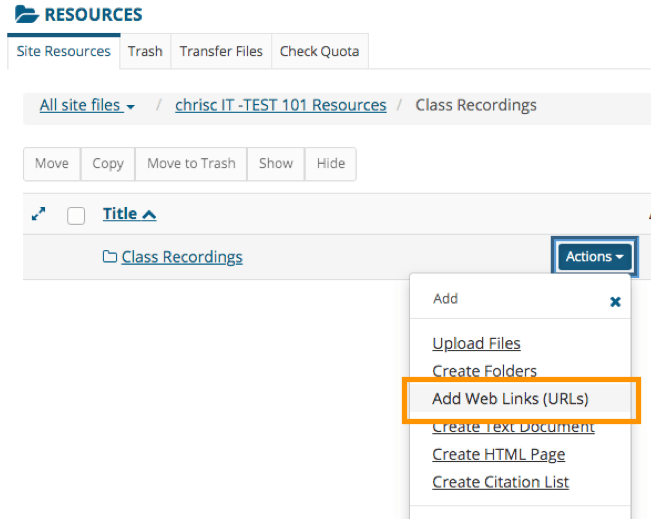
Share in Sakai
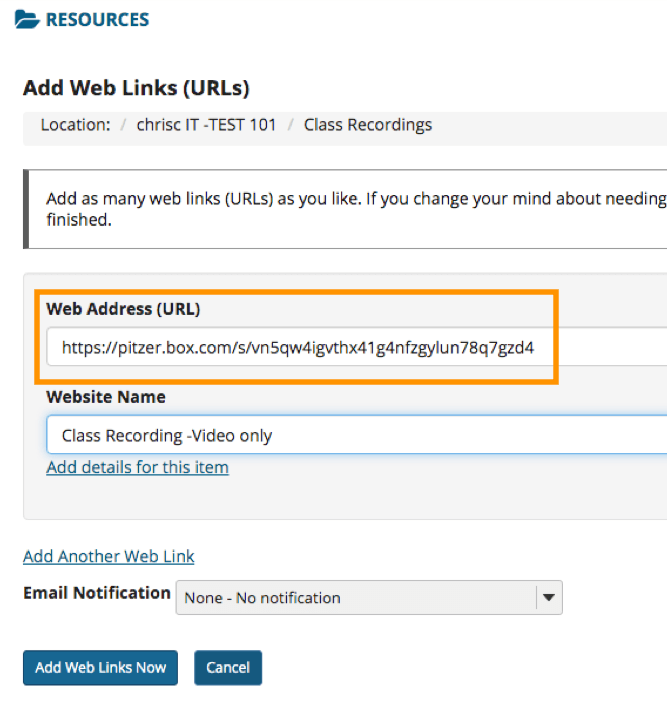
- Add copied link in to Sakai, such as in Resources as a Web Link. In Resources, click Actions > Add Web Links (URLs)
- Paste the Box link into Web Address (URL) as the example, then select Add Web Links Now
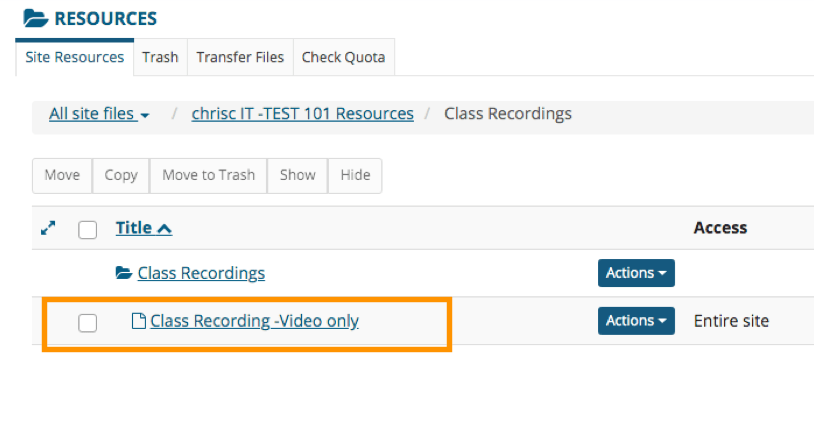
- Your video is now available to students with your Box settings applied
Related Links: